User Guide for Despatchy
Introduction

Welcome to the Despatchy App User Guide. This document is designed to help you get the most out of the Despatchy App and understand how to use its features and functions.
In this guide, you will find information on the various features of the Despatchy App, including how to log in and navigate the user interface, create, and manage bookings, and track job status updates. Whether you are a first-time user or have used Despatchy before, this guide is designed to provide you with the information you need to be successful.
Our goal is to make the Despatchy App as user-friendly and intuitive as possible so that you can get started right away. If you have any questions or concerns, please don’t hesitate to reach out to our support team for assistance. We are here to help you every step of the way.
Overview
Despatchy is a cutting-edge booking software designed for the transportation industry. It streamlines the booking process, making it easier and faster for users to schedule and track jobs, and provides real-time updates on the status of each job.
With Despatchy, users can create and manage bookings, add notes and attachments, and receive notifications when bookings are scheduled, updated, or completed. The intuitive user interface and powerful features make Despatchy the ideal solution for anyone looking to improve their transportation business.
Despatchy is designed to work on a wide range of devices and platforms, including desktop computers, laptops, tablets, and smartphones. This makes it easy for users to access and manage their bookings on the go, wherever they are.
Whether you’re a small business owner, manager, or dispatch agent, Despatchy provides the tools you need to run your transportation business efficiently and effectively.
Target Audience
The Despatchy App User Guide is intended for customers who book pickups and deliveries for their transportation of consignments. This includes business owners, managers, and dispatch agents who are responsible for scheduling and tracking jobs, managing bookings, ad ensuring the timely delivery of goods.
This guide provides detailed instructions on how to use the Despatchy App to book and manage jobs and is written with the customer in mind. Whether you’re new to Despatchy or have used it before, this guide will help you get the most out of the software and streamline your booking process.
Getting Started
System Requirements
Despatchy is a web-based application that can be accessed through a browser with internet connectivity. It is compatible with a wide range of devices, including desktop computers, laptops, smartphones, and tablets. All you need is a device with an internet connection to get started. This flexibility makes it easy for you to access and manage your bookings on the go, whether you’re in the office, on the road or working remotely. With Despatchy, you have all the tools you need to run your transportation business efficiently, no matter where you are.
Login to Despatchy
Step 1: Copy the given URL link into your chrome.
| Application Type | URL | Description / Comments |
| Production | https://app.despatchy.net/ | Use this for production server access. |
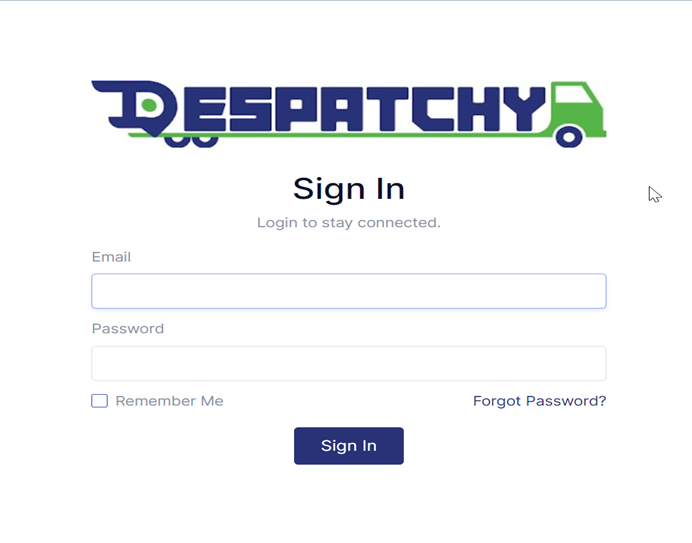
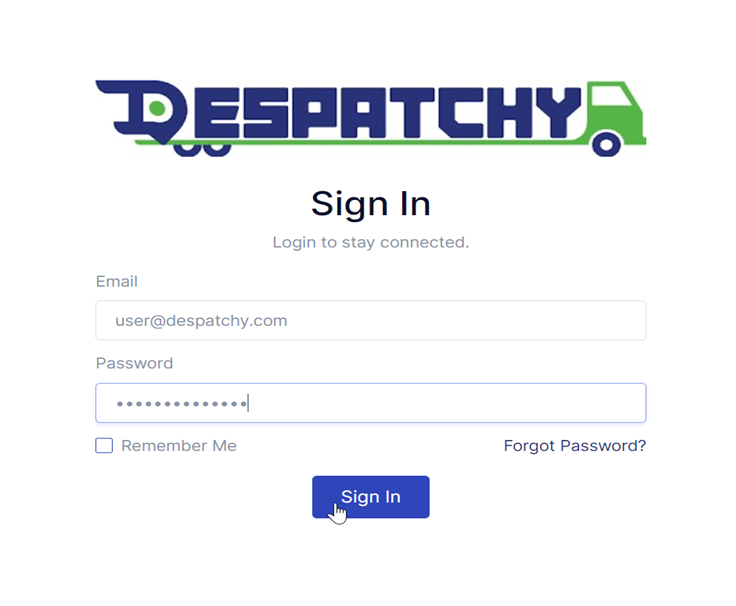
Step 2: Fill in the email and password to get access.
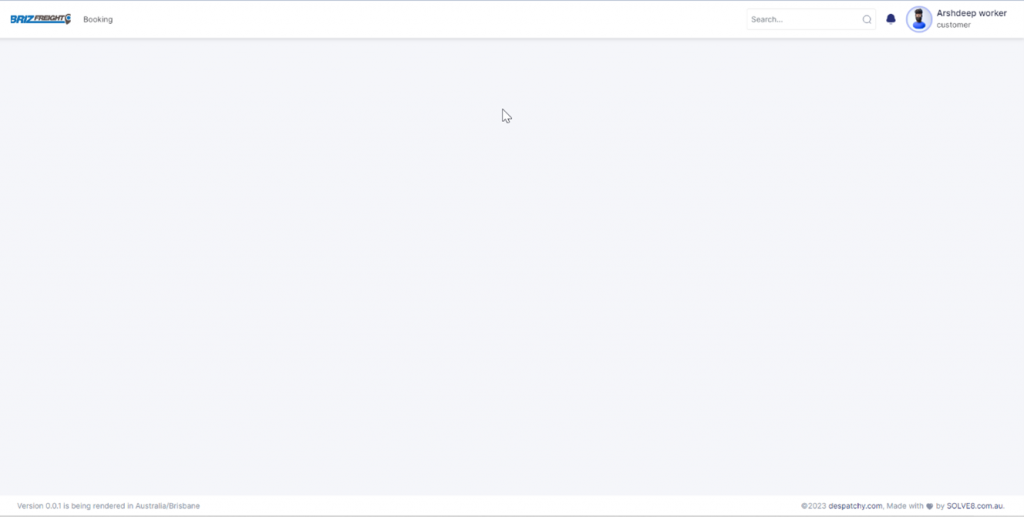
Once you are logged in, you will be able to navigate the Despatchy platform with ease. The main navigation menu is located at the top of the page and provides access to all the features and tools you need to book and manage jobs.
With Despatchy’s user-friendly interface, you’ll be able to find quickly and easily what you need. Whether you’re scheduling a new booking, tracking the status of a job, or managing your bookings, Despatchy makes it simple and straightforward.
Setting up your profile
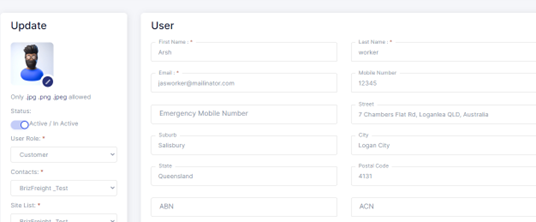
This section covers how to set up your profile in Despatchy, including how to enter personal information, update contact details, and manage privacy settings. It’s essential to provide clear instructions and helpful tips to make the setup process as smooth as possible. Navigate to the top right corner and click on User profile to access your details.
Booking Jobs
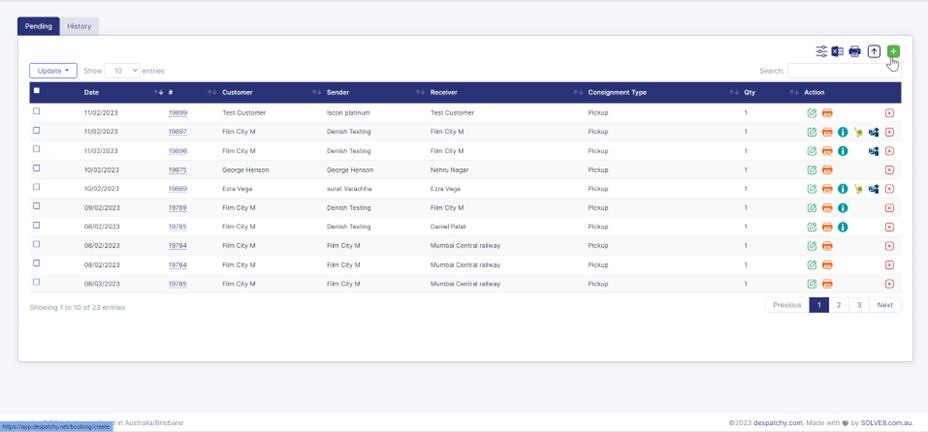
Step 1: To create a new booking, simply click on the “Booking” section in the main navigation menu and select the “+” button. This will bring up the new booking form.
Step 2: In the form, you will be required to provide the sender’s and receiver’s information, select the products being transported, enter reference details for the consignment, and choose the terms and conditions for the booking. Additionally, you will be able to select who will be paying for the freight.
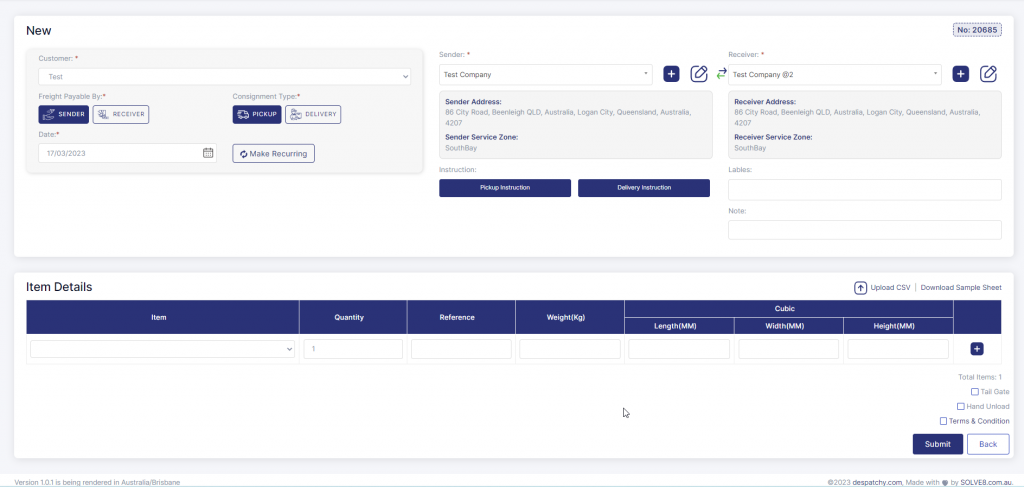
Step 3: Once you have entered all the necessary information, submit the booking form by clicking the submit button.
After submitting the new booking form, one of the BrizFreight team will review and confirm your booking. They will then send you a confirmation, letting you know that your booking has been successfully received and is being processed.
With Despatchy, booking jobs has never been easier. The intuitive booking form and real-time updates make it simple to keep track of your consignments and ensure that your deliveries are made on time, every time.

Edit Booking
You can make changes to your unconfirmed bookings. You can do so by following these steps:
Step 1: Navigate to the booking page.
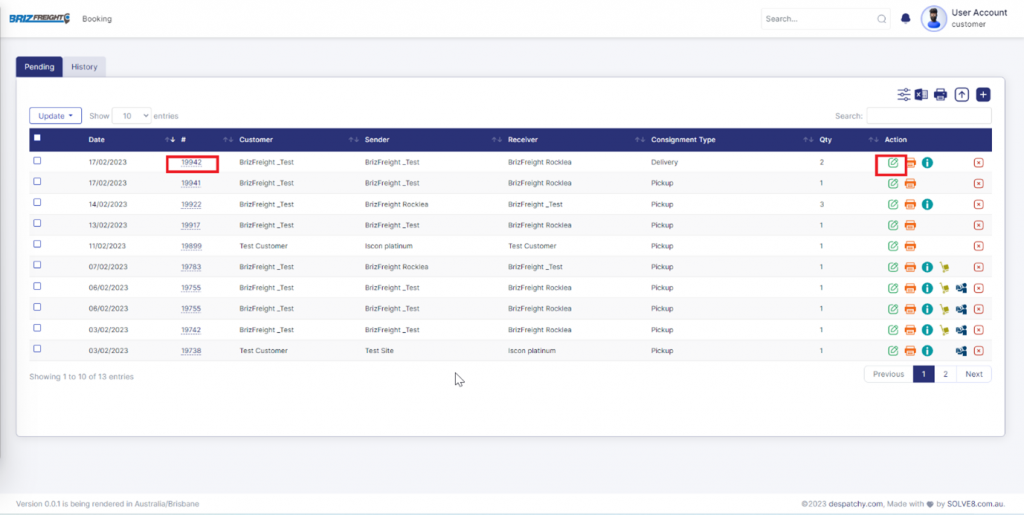
Step 2: Select the booking you want to edit by either clicking on the booking number or clicking on the edit icon. You will be redirected to the “update booking” page.
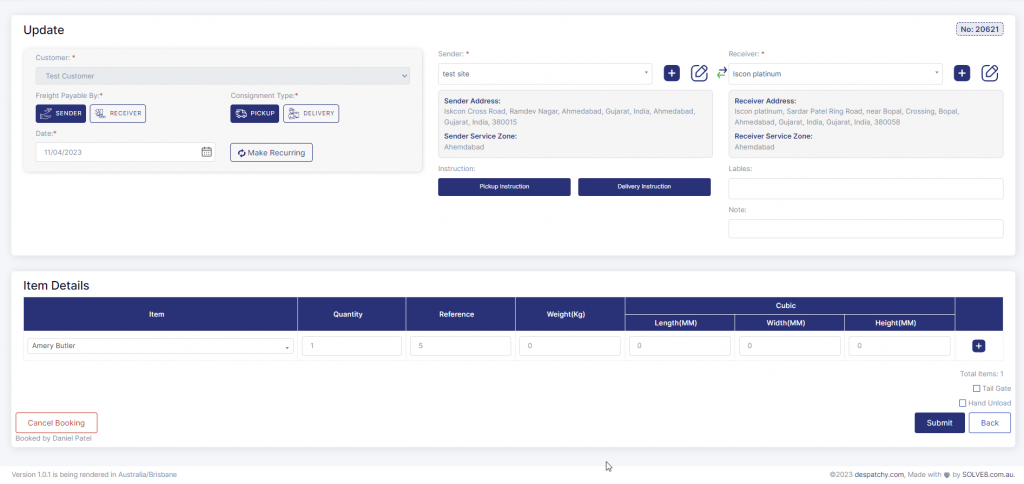
Step 3: Make changes to the booking details and press the submit button.
Cancel Booking
The user has the option to cancel the unconfirmed booking by following three simple steps.
Step 1: Navigate to the booking page.
Step 2: Click the cancel button on the individual booking listed on the booking list.
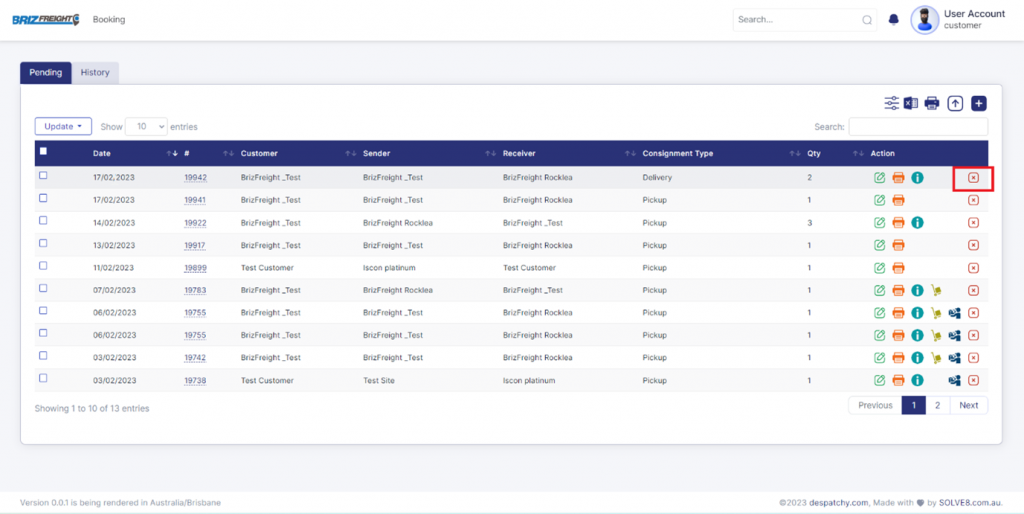
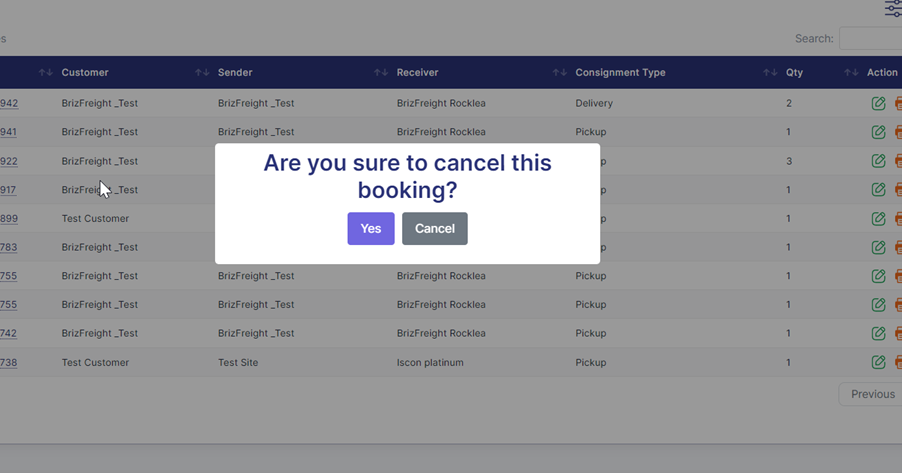
Step 3: Once you click on the cancel button, a popup appears asking for confirmation. Select “Yes” if you wish to cancel the booking,
Adding Sites
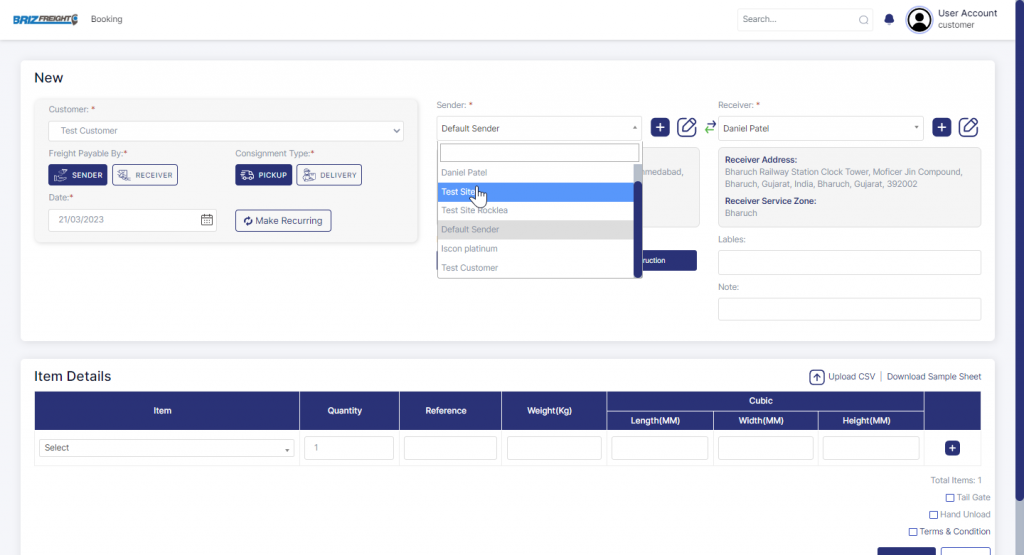
Adding a new site: While on the create booking page, you have the option of arranging delivery for a new site.
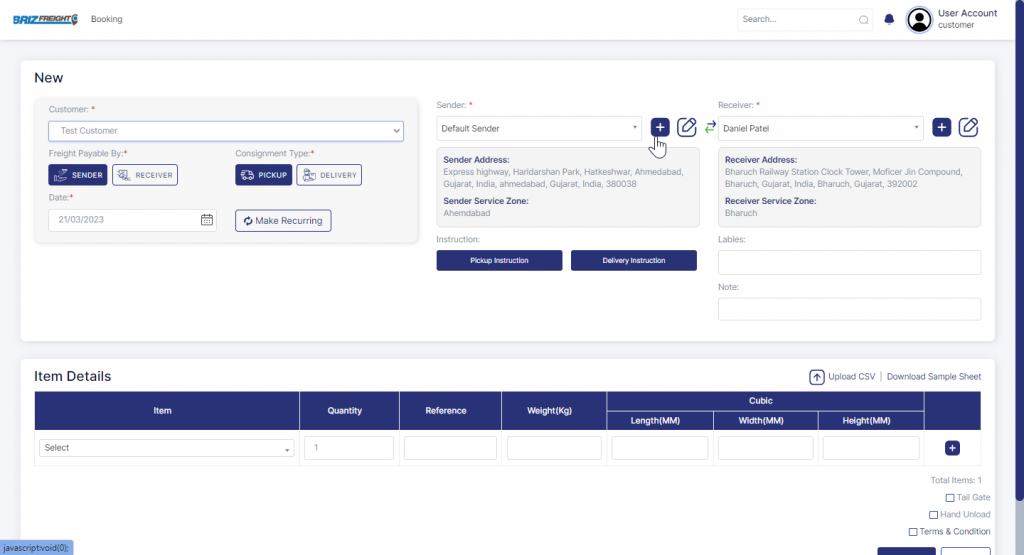
Step 1: On the create booking page, click the plus symbol to the right of the sender and receiver form fields.
Step 2: Next, fill up the site details and press the submit button.
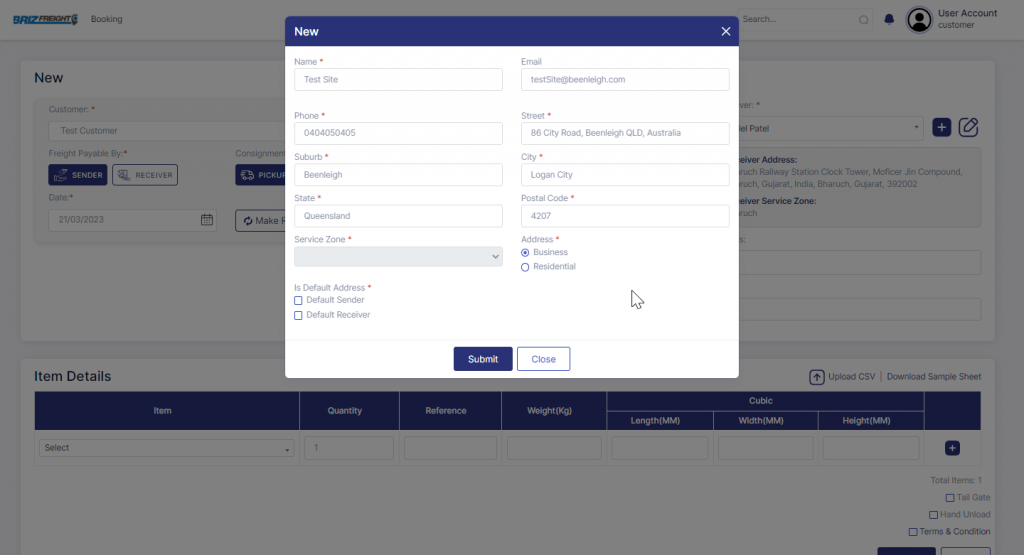
Step 3: At this point, you can choose the new site from the dropdown menu.
Final Confirmation
Once you have entered all the necessary information and submitted the booking form, one of the BrizFreight team will review and confirm your booking. They will then send you a confirmation, letting you know that your booking has been successfully received and is being processed.
With Despatchy, booking jobs has never been easier. The intuitive booking form and real-time updates make it simple to keep track of your consignments and ensure that your deliveries are made on time, every time.
